

Quick answer
You can cut most LED strip lights only along the printed cut lines, which appear every 1 to 4 inches and are marked with a small scissor icon between a pair of copper solder pads. Rejoin or extend the pieces with solderless clip-on connectors or by soldering wire to those pads, always keeping voltage and polarity consistent.Where LED strips can be cut
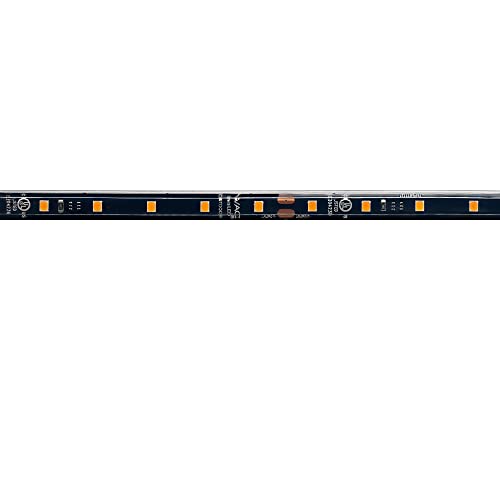
Flexible LED strips are built as a repeating chain of small circuits. Each repeat ends at a cut line, and cutting anywhere else breaks the circuit and kills every LED after the cut in that segment.- Look for the dotted line with a small scissor symbol.
- On either side of that line you will see two (or more) copper dots or pads labeled with polarity, such as + and -, or with data markings like DO/DI on addressable strips.
- Standard 12V and 24V strips usually allow a cut every 2 to 6 inches; higher-density and 120V line-voltage strips have longer or different intervals.
How to connect cut pieces
Once cut, you have two ways to rejoin strips or add a connector.Solderless clip-on connectors
These are the easiest option for most people. You lift a small clip or slide the strip into a channel so spring contacts land directly on the copper pads.- Match the arrows: the connector and strip both indicate current direction, so align + to + and - to -.
- Seat the strip fully so both pads contact the metal tabs, then close the clip.
- Choose the right connector width (8mm, 10mm, and so on) and type (strip-to-strip, strip-to-wire, corner, or gapless).
Soldering
A soldered joint is the most reliable and lowest-resistance connection.- Tin each copper pad with a little solder, tin the wire ends, then join them with a quick touch of the iron.
- Keep polarity correct and avoid bridging the two pads.
- Slip heat-shrink tubing over the joint for insulation and strain relief.
How to extend a run
Extending simply means adding more strip or bridging a gap.- Strip-to-strip connectors or short jumper wires let you turn corners or jump over a mounting obstacle without a visible gap in the tape.
- Confirm the total length does not exceed the strip's rated maximum run for a single feed. Every foot of copper adds resistance.
Watch out for voltage drop
Voltage drop is the most common reason a long extended run looks dim or shifts color at the far end. As current travels down the strip, resistance in the thin copper traces reduces the voltage reaching distant LEDs.Ways to manage it:
- Keep single runs within the manufacturer's stated limit (often around 16 feet for 12V and longer for 24V).
- Power longer installs from both ends, or run heavier-gauge wire back to the supply and inject power at the midpoint.
- Prefer 24V strips for long runs, since higher voltage means lower current and less drop.
Common mistakes to avoid
- Cutting between cut lines and wondering why a section is dead.
- Mixing voltages, such as feeding a 12V strip from a 24V supply, which burns out LEDs.
- Reversing polarity, which leaves non-addressable strips dark and can damage addressable ones.
- Overloading a single thin connector with a long, bright run.
- Bending a strip sharply at the pads, which cracks the copper.
A note on safety
Most LED strips run on low-voltage DC from a plug-in driver, which is relatively safe to handle. The higher-voltage side matters: if you are wiring a driver into a junction box, hardwiring a transformer, or connecting a 120V line-voltage strip, turn off power at the breaker first and confirm it is off with a tester. Any work involving building wiring, a new circuit, or an in-wall driver is a job for a licensed electrician. This article is general information, not a substitute for professional electrical advice, and local code may dictate how and where low-voltage wiring can be run.With the right cut lines, matched polarity, a solid connection method, and attention to voltage drop, you can shape LED strip lighting to almost any layout and extend it cleanly.