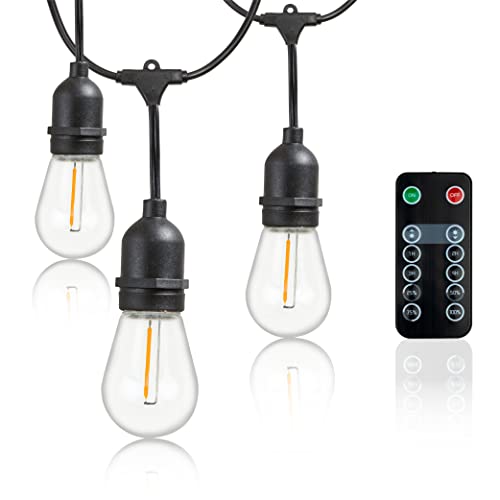
To hang string lights across a patio, mount a solid anchor point on each side, run a stainless steel guide cable between them pulled taut, and attach the lights to that cable with zip ties or hooks. Plan a gentle drape, keep bulbs above head height, and use only outdoor-rated lights on a GFCI-protected outlet.
Plan the layout first
Before buying anything, sketch your space and decide on a pattern. Common options:
Straight runs from one side to the other, side by side, for even coverage.
Zigzag back and forth across the area for a canopy effect.
Crisscross diagonals meeting in the middle, great over a square patio.
Perimeter runs following a fence, pergola, or roofline.
Measure the total distance the lights must travel, then add roughly 10 to 15 percent for the natural sag, or drape, between supports. Buy enough length to reach a power source without stretching the last section tight.
Gather anchor points and supports
Your lights need something solid to attach to at each end and, for long spans, in the middle. Good anchors include:
House walls, fascia, or a pergola frame
Fence posts or deck posts
Trees (use a tree strap or protective wrap, not a nail into the trunk)
String light poles set in buckets of concrete, large planters, or post anchors, for open areas with nothing to attach to
For each anchor you can use screw-in cup hooks, eye hooks, or outdoor-rated wall hooks. Pre-drill before driving hooks into wood, and use appropriate anchors for masonry or stucco.
Use a guide cable for long or heavy runs
Light-duty strands can droop, snap, or blow around in wind if hung on their own across a wide span. The reliable fix is a guide wire: a length of vinyl-coated stainless steel aircraft cable stretched tight between your anchors. The cable carries the tension; the lights just hang from it.
A basic guide-wire kit uses:
Vinyl-coated stainless steel cable
Turnbuckles to tension the cable
Eye hooks or screw eyes at each anchor
Cable clamps (ferrules) to form the loops
Steps:
Fix an eye hook into each end anchor.
Attach a turnbuckle to one hook, fully loosened.
Run the cable from the far hook, through or around the turnbuckle, and secure the loops with cable clamps.
Tighten the turnbuckle until the cable is taut with only a slight sag.
Attach the light strand to the cable every 12 to 18 inches with UV-resistant zip ties or S-hooks.
Attach the lights and set the drape
Whether you use a guide wire or hang lighter strands directly, aim for an even, gentle swoop between supports rather than a tight straight line. A slight drape looks intentional and relieves stress on the wire.
Keep the lowest point of any drape above head height, generally at least 7 to 8 feet over walking areas so no one hits a bulb.
Space multiple parallel runs evenly for a balanced canopy.
Leave a small drip loop near each connection so rain runs off the wire instead of into the plug.
Trim excess zip ties, and coil any leftover strand neatly near the outlet rather than bunching bulbs together.
Power it safely
This is the part people rush, so slow down here.
Use only string lights rated for outdoor use; check the tag or box.
Plug into a GFCI-protected outlet (the kind with TEST and RESET buttons). GFCI protection is the key safety feature for anything outdoors near moisture.
Use outdoor-rated extension cords if you must extend, and keep all connections off the ground and out of puddles.
Do not run cords through doors or windows that pinch them, and never staple through the wire.
Electrical safety note
If your plan needs a new outdoor outlet, a switch, or any hardwiring, that is a job for a licensed electrician, and exterior receptacles must be GFCI-protected in a weatherproof, in-use cover. Turn off power at the breaker before touching any existing wiring, and confirm it is dead. This site provides general guidance only and is not a substitute for a licensed electrician.
Weatherproofing and seasonal tips
Choose LED string lights; they run cooler, use less power, and let you connect more strands end to end (check the maximum on the packaging).
Wrap outdoor plug connections with weatherproof tape or a cord-connection cover, or tuck them under a covered area.
In storm-prone or off-season months, take lights down or at least unplug them; wind fatigue and standing water shorten their life.
Quick checklist
Layout sketched and length measured with a sag allowance
Solid anchors at both ends, plus poles for open spans
Guide wire tensioned for long or heavy runs
Bulbs kept above head height with a gentle drape
Outdoor-rated lights on a GFCI outlet, connections weatherproofed
With the guide wire doing the structural work and a GFCI outlet handling the safety, a patio string-light install can go up in an afternoon and stay put through the season.
Frequently Asked Questions
Not always, but it helps for long or heavy runs. Light strands can droop, tangle, or snap across a wide span in wind. A tensioned stainless steel guide wire carries the load while the lights simply hang from it, keeping the run neat and secure. For short spans between close, solid anchors, you can often hang lighter strands directly.
Keep the lowest point of any drape above head height, generally at least 7 to 8 feet over walking areas, so no one bumps a bulb. Over seating or a table you can hang them a little lower for atmosphere. Aim for a gentle, even swoop between supports rather than a tight straight line, which looks better and reduces strain.
Use only string lights rated for outdoor use, and plug them into a GFCI-protected outlet, the kind with TEST and RESET buttons, which is the key safety feature outdoors. Keep connections off wet ground and add a drip loop at each plug. If you need a new exterior outlet, hire a licensed electrician; it must be GFCI-protected in a weatherproof cover.