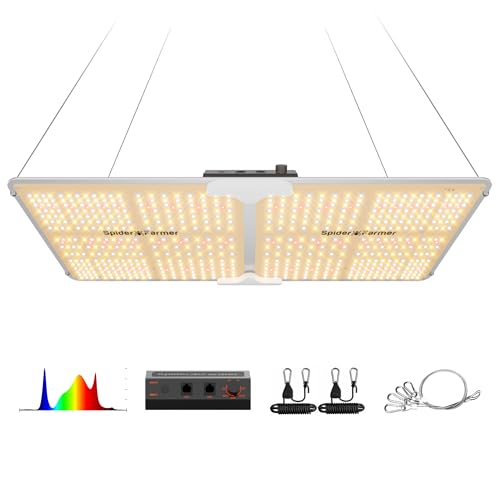
Most LED grow lights hang 12 to 24 inches above the plant canopy, with the exact height depending on wattage and stage: seedlings want lights higher (around 24 to 36 inches), while flowering plants under strong lights sit closer (12 to 18 inches). Always follow the manufacturer's chart and watch how the plants respond.
The Short Answer, by Stage
Hanging height is a balance: too close and you scorch or bleach leaves; too far and plants stretch and grow weak. General starting points for LED grow lights:
Seedlings and clones: 24 to 36 inches above the canopy. Young plants are sensitive and need gentler light.
Vegetative growth: 18 to 24 inches. Plants are hardier and want more intensity.
Flowering or fruiting: 12 to 18 inches. This stage benefits from the strongest light the plant can handle.
These are starting points. The right height depends heavily on how powerful your light is.
Why Wattage and Intensity Change the Height
A small LED panel and a high-powered fixture cannot hang at the same distance. The stronger the light, the farther away it must sit to avoid delivering too much intensity to the canopy.
Low-power lights (small panels, a few tens of watts): can sit closer, often 12 to 18 inches even for young plants.
High-power lights (hundreds of watts): need more distance, sometimes 24 to 36 inches or more, especially early on.
This is why the manufacturer's hanging chart matters. Good grow lights list a recommended height (and often a target PPFD) for each growth stage. Start there.
Use PPFD If You Can
The most precise way to set height is by PPFD (photosynthetic photon flux density), the amount of usable light reaching the canopy:
Seedlings: roughly 100 to 300 micromoles per square meter per second.
Vegetative: roughly 300 to 600.
Flowering: roughly 600 to 900+ (some fruiting plants tolerate more with added CO2).
A PAR meter or a lighting app estimate lets you set the light so the canopy receives the right intensity, then you adjust height to hit that range.
Read the Plants: Too Close or Too Far
Your plants are the best feedback you have.
Too close (too much light):
Bleached, white, or yellow patches on the top leaves nearest the light.
Leaf tips curling or clawing upward.
Crispy or burned leaf edges.
Upper leaves fading while lower ones look fine.
Too far (not enough light):
Stretching: long, thin stems and wide gaps between leaf sets.
Plants leaning or reaching toward the light.
Pale, spindly, weak growth.
If you see burning, raise the light a few inches. If you see stretching, lower it gradually. Make small changes and give the plants a few days to respond.
Coverage and Uniformity
Height also affects how wide an area the light covers. Raising a light spreads its footprint but lowers intensity; lowering it concentrates intensity but shrinks coverage.
If plants at the edges of your grow area are stretching while the center looks fine, the light may be too low for even coverage; raise it slightly or add a second fixture.
Keep the canopy level so every plant sits about the same distance from the light. Rotate or prop up shorter plants as needed.
Practical Tips
Hang on adjustable ratchets or chains so you can raise the light as plants grow and keep a consistent gap.
Measure from the top of the canopy, not the pot or the floor, and re-check as plants grow taller.
Start higher, then lower. It is safer to begin too far away and move closer while watching for stress.
Account for a fan. If you run airflow, plants toughen up and can often handle slightly more intensity.
A Simple Routine
Check the manufacturer's recommended height for your stage and start there.
If you have a meter, dial in the target PPFD for the stage.
Watch the canopy for a few days.
Raise the light if you see bleaching or curling; lower it if you see stretching.
Re-measure the gap every week as plants grow.
Get the height right and everything else, from color to yield, gets easier. When in doubt, err on the side of a little too far and adjust down slowly.
A Note on Setup
Grow lights typically plug into a standard outlet, so most setups need no wiring work. Make sure fixtures are hung securely from solid anchors or a rated support so nothing falls onto plants or people, and keep cords and any timers away from water. For any hardwired fixtures or new circuits, turn off power at the breaker and consult a licensed electrician.
Frequently Asked Questions
Seedlings and clones are sensitive, so hang LED grow lights higher, roughly 24 to 36 inches above them, especially under powerful fixtures. Low-power panels can sit a bit closer. Start high and watch for stretching; if seedlings grow long and thin reaching for the light, lower it gradually. Always check the manufacturer's recommended height first.
Watch the top leaves nearest the light. Signs it is too close include bleached white or yellow patches, curling or clawing leaf tips, and crispy burned edges, often while lower leaves look fine. If you see these, raise the light a few inches and give the plant a few days to recover before adjusting again.
Yes. Plants can handle more intensity as they mature, so flowering plants are usually kept closer, around 12 to 18 inches under strong LEDs, to deliver higher PPFD. Move the light down gradually rather than all at once, and keep watching the canopy for any bleaching. Always stay within the manufacturer's recommended range for your fixture.