

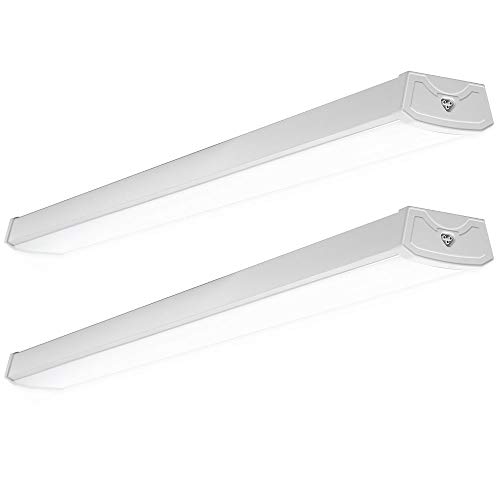


To install linkable LED shop lights, mount each fixture to the ceiling or joists, plug the first into a nearby outlet, then daisy-chain the rest using the included connector cables. Most run off a single outlet up to the manufacturer's maximum linked count, giving you even garage lighting without any extra wiring.
What "Linkable" Means
Linkable (sometimes called connectable) LED shop lights are designed to be joined together in a series. One fixture connects to the next with a short jumper cable or plug, so an entire row runs from a single wall outlet. This is what makes them so popular for garages: you get a long line of bright, even light with minimal wiring.
Each product line has a maximum number of fixtures you can safely link on one outlet. That limit is printed on the packaging or in the manual, and you must not exceed it, because all the linked lights draw power through that first plug.
Before You Start: Plan the Layout
- Decide how many fixtures you need using a lumen target (roughly 50 lumens per square foot for a general garage, more for a workshop).
- Sketch even rows so light is spread across the space, not bunched in the middle.
- Locate the outlet you will plug into and confirm the row will reach it. Note where the linking cables and mounting points fall.
- Check the maximum linkable count so you do not overload a single outlet or circuit.
Tools and Hardware
- Drill/driver and appropriate screws or the included hardware.
- Toggle or drywall anchors if mounting to a finished ceiling, or screws directly into joists.
- Tape measure, pencil, and a stud/joist finder.
- A sturdy ladder and a helper for holding fixtures.
Step-by-Step Installation
1. Turn off power to the outlet (safety first).
Before doing anything near the outlet you will use, turn off the breaker for that circuit and confirm the outlet is dead with a tester. Even though these lights plug in, treat the outlet with respect.
2. Mark your mounting points.
Measure and mark even spacing for each fixture. Line up marks so the fixtures form straight rows and the linking cables reach between them without strain.
3. Mount the first fixture.
Attach it using screws into joists (strongest) or with rated drywall anchors. If using hanging chains or hooks, install the hooks into solid framing.
4. Mount the remaining fixtures.
Keep spacing consistent. Confirm each fixture's link ports face the next fixture so the connector cables run neatly.
5. Link the fixtures.
Snap the included jumper cables or plug connectors between fixtures, working down the row. Do not exceed the maximum linked count for that product.
6. Restore power and plug in.
Turn the breaker back on, plug the first fixture into the outlet, and test the whole row. Many linkable lights include an on/off switch on the fixture or an inline switch on the cord.
7. Tidy the cables.
Use cable clips or ties to secure any slack so cords are not hanging where they can snag.
Powering the Row
Linkable lights that plug in are the simplest option and require no electrician. But keep these points in mind:
- Respect the linked limit. Chaining more fixtures than allowed overloads the first plug.
- Mind the circuit. If the garage circuit already runs a fridge, opener, or power tools, factor that into the load.
- Switch control. To control the whole row from a wall switch, you can plug into a switched outlet, or have an electrician wire the row to a switch.
Hardwiring Option
Some linkable shop lights can be hardwired instead of plugged in, which gives a cleaner look and wall-switch control. Hardwiring means connecting the fixture directly to house wiring inside a junction box.
This is where you should stop and think about your comfort level. Hardwiring, adding a new circuit, or installing a new switched outlet is electrical work that must follow code.
Safety Note
Turn off power at the breaker and verify the circuit is dead before touching any wiring or the outlet. For hardwiring, adding circuits, installing new outlets, or anything you are unsure about, hire a licensed electrician. Do not exceed the manufacturer's maximum linkable count, and do not overload the circuit; both are real fire hazards. This article is general information, not a substitute for a licensed electrician.
Quick Recap
Done right, a row of linkable LEDs turns a dim garage into an evenly lit, work-ready space in an afternoon.